Showing posts with label 3D Printer. Show all posts

Friday, 25 August 2017

Exciting news - 3D printing business now fully underway!

Hi All,

Having spent the last year building up a 3D printing business (This being the reason for the long time since the last post), I am pleased to announce that Regulus 3D is officially operating from September for 3D printing your models, being run and operated by my Wife, However I am still the technical authority, and will be technical support for the printers.

We are starting out with the CEL Robox, but will be adding to this in October, so get sending us your print requests, we are also on 3DHubs

https://www.3dhubs.com/manage/Regulus3D#/hub/home

We have already been developing a standard product range that we will be printing, including Raspberry pi Cases, and Radio controlled 1/10th scale car parts - Watch this space for pictures of some of our recent prints

Tuesday, 20 December 2016

UP Box... Biggest waste of money (and Time) ever spent

Can I say that the original UP box has been the biggest waste of money ever - We have been using this for just under a year (purchased from CPC in Feb 16, even though we find out from the UK distributor that the printer (from the serial number) is now out of warranty from the manufacturer! - 1st bad point).

So in this time we have had several failures,

1) It has had a replacement CPU board,
2) 6 x print head FPC cables (In fact this is a serious design flaw of the UP Box, and requires regular maintenance),
3) The brackets that hold the print head board on need regular replacement...

4) We are on our second print head (£250 for a new print head and extruder), when all that was needed was a new extruder wheel on the stepper motor

5) Where we used to be able to print a whole platform, now restricted to just the middle area of the platform, otherwise the printer stops printing mid way through - from not extruding, to prints lifting.

6) Latest error after replacing the FPC boards (as we suspected the connector on the board had now worn out), the up box levelling system has broke (this happened, as the levelling system came switched on on its own at the start of the print and them proceeded to crash into the print bed, destroying the microswitch in the process) - Levelling system seems to stay off until the print head is about to start printing, and then randomly starts to move down and up!!!

7) Front door doesn't close properly (appears to be warped, and the hinges need to be twisted inorder to close correctly)

So conveniently now we have a printer that appears to be out of warranty from the manufacturer - and they don't recognize that it was brought new a few months after it was manufactured! and is now developing major issues just outside the warranty!

Would I buy an Up again? - given the issues here, No... And actually I have recently purchased for myself a Cel-Robox, plus a Raise3d printer for the office as a second machine. Note the Raise3D N1 has the same build area as the Up Box, is dual extruder, build quality is twice (if not three times as good) as the UP box, and is only £500 more that the UP..What this says to me is that the Up Box is overpriced for what it is.

Oh did I say I now need to get the thing working again!! = more money

Thursday, 12 May 2016

Rigid Ink PMMA and the UP! Box Printer

Well after trying the Rigid Ink ABS, I figured I would give their PMMA filament a try as it extrudes at around the same temperature as ABS specified for the UP! Box Printer (Note that the UP! Box has a fixed pre-programmed setting for ABS, Therefore you have to get the right spec material to match with the fixed temperature setting), Therefore suitable for use with the UP! Box printer.

PMMA is a Plexi Glass (Acrylic)  filament.

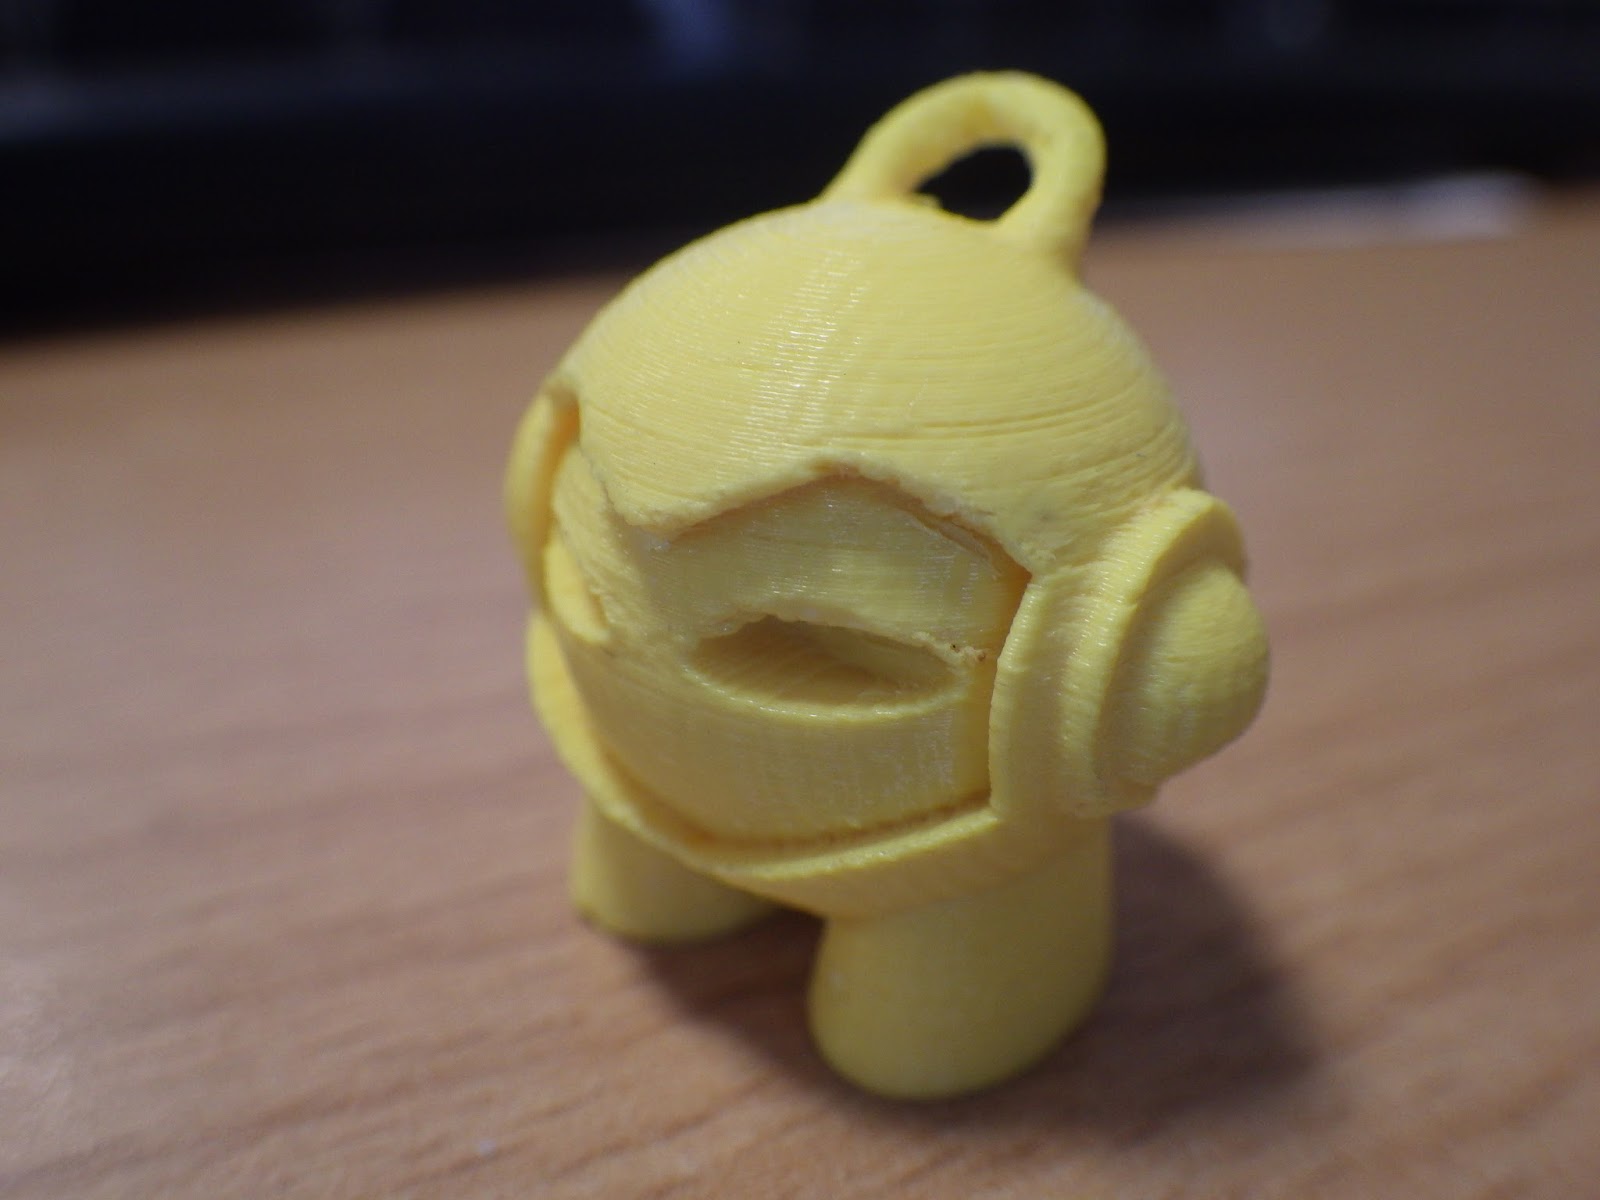
So printing out the Marvin robot gives me the following results based on 100 micon layer resolution


Looking at the printout, this is much more clearly defined than the ABS Printout, the Keyring loop comes out nice and clean

With the next print, a cog, just to see how accurate we can go.


Finally a nut and bolt, the thread here is almost perfect, this is exactly how it came off the printer.


All Prints come out really clean and defined, I think the natural translucent material would make a good filament for printing out some designs I have for Orchid pots, as this will allow light to the roots, as well as providing a decorative pot.

Yet again I am amazed at the quality of the filament from Rigid Ink, Absolutely top quality, You can find their filament either directly from Rigid Ink

https://rigid.ink/products/pmma-1-75-mm-0-03-mm-tolerance

or you can even buy from Amazon

https://www.amazon.co.uk/rigid-ink-Filament-Printers-Tolerance-Translucent/dp/B01C8P46FY/ref=sr_1_1_det?ie=UTF8&qid=1462576152&sr=8-1#productPromotions


Wednesday, 27 April 2016

Rigid Ink and the UP! Box 3D printer


So Sometime ago I got a sample of Rigid Inks ABS Filament - Unfortunately you don't get to choose the colour, but at least you get to try out a different supplier.

Here are the results of printing on the UP! Box, Printing our a marvin robot keyring.


Here is the print smoothed with Acetone to see how the filament smooths out.

Looks pretty good doesn't it.. On the white tiertime filament that comes with the UP! Box printer, it struggled with the key ring loop at the top of the robot, however with the RigidInk filament not a single problem.. It really is amazing as I was expecting the tiertime filament to out perform the Rigid Ink filament considering that the Rigid Ink filament was extruded at the upper end of its temperature range. Also I have been finding the green ABS filament from UP! manufacturer struggles to get going in as much if you put in a reel after the printer has rested, the filament requires an extra bit of pushing to get it to start extruding properly. - Now this is filament that is meant to be compatible with the UP printer (This of course could just be the green filament being the problem, and that any other colour would be fine)..

From my initial Test I am definitely sold on the Rigid Ink Filament, it is a shame that the colours are limited, for instance would be great to have a glow in the dark filament.

I am definetely going to try and get some of their other filament to test - Looks like I should be able to print PMMA and Nylon12 with the standard UP! Box setup - so watch this space!

Oh the final plus of Rigid Ink Filament is the cost - For the filament for UP! Box I have been paying £27 for a 500g reel, Rigid Ink filament is the same price but for double - yes double 1kg reel! Bargain

Tuesday, 12 April 2016

Up! Box Printer - Part 2 - First Print


It has taken a while, as it has been a bust period of printing parts for work. But I thought I should publish this post as a followup now.

Having setup the printer, I didn't get round to printing until after the weekend. So when I got back into work on the Monday, the printer was fired up - Now each time its switched on you have to initialize it via the initialize function in the software. One thing I was a little disappointed with is that unlike the Ultimaker 2 which can be used standalone and can select and read the files at the printer without a PC connection, the UP! Box appears to be designed to be connected up to a PC!.

Anyway once initialized has been completed, you load the part and locate it on the bed in software. The Software did seem a little clunky. To move the part you first must select the move icon and then in the drop down menu next to this select how much +/- you wan to move by and then press the x, y, or z button. To rotate you select the rotate button and then do the same. Not as nice as using arrow keys, or the mouse.. and takes some getting used to.

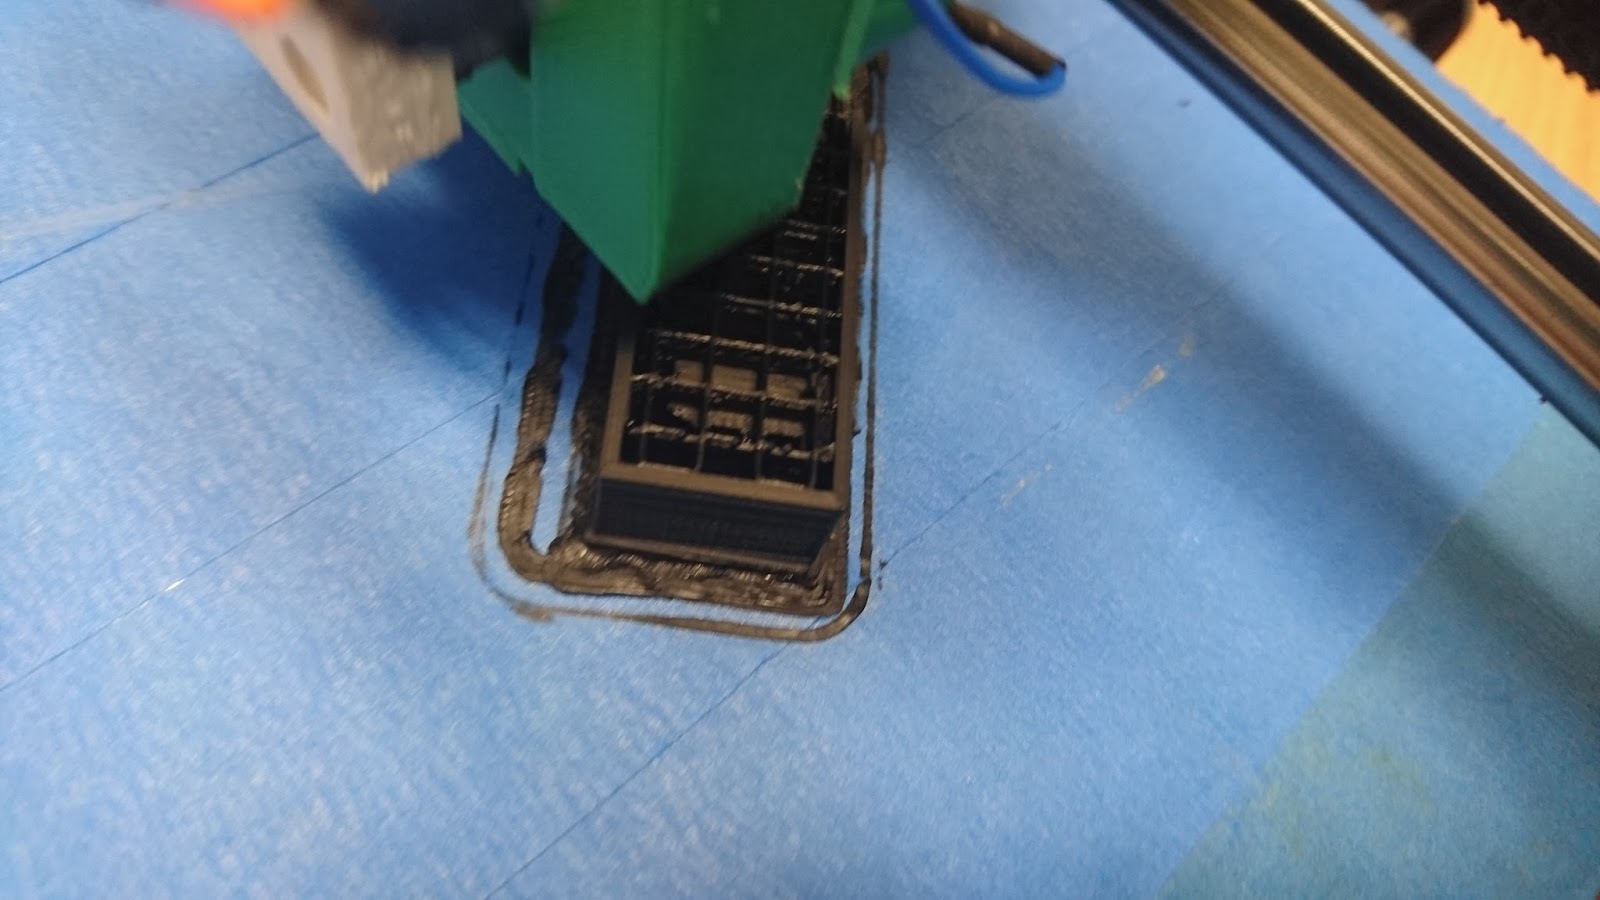
Here is the first print being printed, it is the bracket. When printing the UP BOX logo lights up to tell you the progress of the print, it also lights up different colors depending on whether there is an error or at what stage of printing, i.e. heating up for instance. - A nice little feature that save looking at the computer screen. If you press the power button once on the printer then inside the printer is lit up so that you can see the print.


Once removed from the printer the bracket can be seen, and its very good quality.


The Quality is definitely on a different order of magnitude to that of my printer, the same print but on my printer can be see here.


There are different speeds of settings to print to, Fine, Normal, Fast or Turbo. I have yet to see any difference in quality and speed between Normal (1.5hr), Fast (1.25hr) and Turbo (just over an hour) - I was expecting bigger differences.. I have set it up to do a reasonable (20% fill) lattice.
You can actually see the lattice structure below.


Sunday, 6 March 2016

UP! Box 3D printer - Part 1

The other week I was able to persuade my employer to purchase a 3D printer for the office. Basically we have a bracket that we have designed for a new product, and getting this machined for a quantity of 1500 was going to cost £5.60 each. 3D printing the part comes out at 60p including the material and energy costs. 

An investment of £1,500 for the printer plus printing out the parts I worked out would cost £3k less than machining! - Hence they accepted my proposal to purchase a 3D printer.

Now onto the choice. I had got the choice down to either the UP! box or the Ultimaker 2. What I wanted was the flexibility and the ease to get up and running. It was a hard choice (I spent nearly two weeks debating over this). But basically since I am the only one in the office with a clue about to get a 3D printer working in the event of something going wrong, I wanted a printer that would work out of the box. So the UP! Box it was.

You can purchase the UP! Box from a number of suppliers, We got ours from CPC (Which are part of the Farnell group).

Here is a link to the printer

http://up3dprinters.co.uk/up-box-features/

I was impressed on reading the specs that you could be up-packed and printing within 15mins!

Upon receipt of the printer I was really impressed with how well it was packed. It really helps to have a second pair of hands to remove it from the box.

Power supply, and tools included.. You will need the scraper!


USB Cable, Spare nozzle, USB stick, allen keys and tool to remove the nozzle


Great Quick start instructions


Software on CD (Same as supplied on the USB memory stick) and print beds


Rear view

Side view with the spool cover

Spool cover removed


Top view


Front View

So you get 4 x printing platforms, 3 perforated which are supposed to be for ABS, and I Guess the plain smooth plate is for PLA. All that is required is to clip off the cable ties that are marked with the yellow tag, load the software and then switch the unit on, perform an initialization and auto level mode and its then ready to print.

To insert the filament into the extruder you first load the reel into the right hand side (Accepts 500g sized reels - 750g at a real push). The filament is fed through the tube and then placed into the extruder. In software you go into the maintenance menu and select extrude. The hot end heats up to temperature for the chosen filament, and then beeps to say its at temperature. Once at temperature you can hear (and feel the filament being pulled into the extruder), this then extrudes a set amount of filament out of the nozzle and then stops - presumably preset up such that if you change filament colour that it extrudes enough filament to remove fully the old color in there!

Now I am ready to print. So far this has been a smooth setup - Really this could be done by anyone without engineering knowledge of 3D printers - I did notice that you can print out spare parts of the printer (as there are the files for the spare parts on the supplied Memory card, and also some of the parts on the printer are obviously 3D printed).

(The software reads in an STL among other file formats and then outputs its own Machine code format - as opposed to GCode) 

So in All - Can you be setup and printing in 15mins? ....... Yes if you don't have to take other calls, whilst setting this up!